


Just register for the free trial below and we will send you everything you need to evaluate QuickBooks Online including 30-day access, the full 76-page QuickBooks Online Guide (details everything that you can do in the software) plus the video training library. Free end-to-end consultation and support are included so if you need any help along the way, just let us know!


Accurate financial records are essential for any business. Part of this process involves maintaining precise opening balances for various accounts in your chart of accounts. These opening balances play a vital role in ensuring that your Balance Sheet is accurate, providing a clear starting point for your financial records.
In this article, we cover the steps on how to enter and manage opening balances effectively in QuickBooks Online. We will also explain why opening balances are crucial in financial management.
Entering an Opening Balance
QuickBooks Online simplifies the process of entering opening balances if you connect your bank and credit card accounts (bank feeds). It automatically downloads historical transactions up to a certain date, calculates the total, and enters the opening balance and date for you. However, if you’re not comfortable connecting your bank account, then you can manually enter the opening balance.
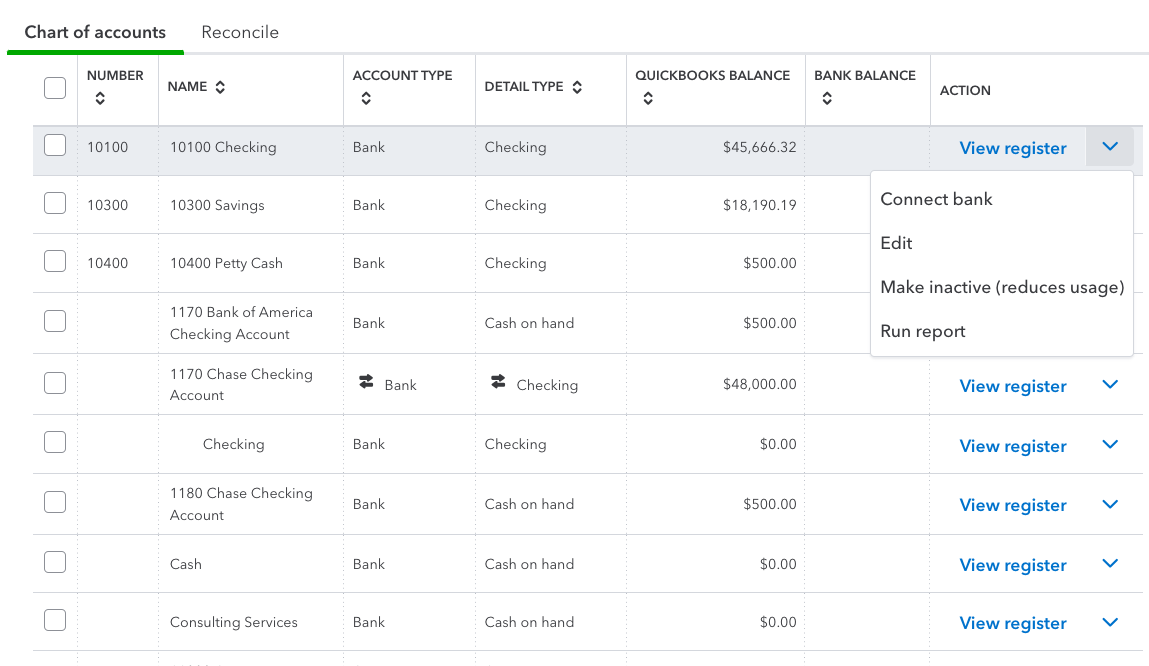
To get started, click on the cog wheel icon on top of your dashboard and then select Chart of accounts. Click New and set up your account. In the open balances section, choose the date from which you want to start tracking your finances. Then, enter the account balance for that specific date. Once done, select Save.
Entering opening balances in QuickBooks Online
You can now start tracking new transactions in QuickBooks Online that occur after the opening balance date.
Edit an opening balance
If you need to add transactions that predate the opening balance date, editing the start date and balance is essential. This establishes a new starting point and prevents double-counting of transactions.
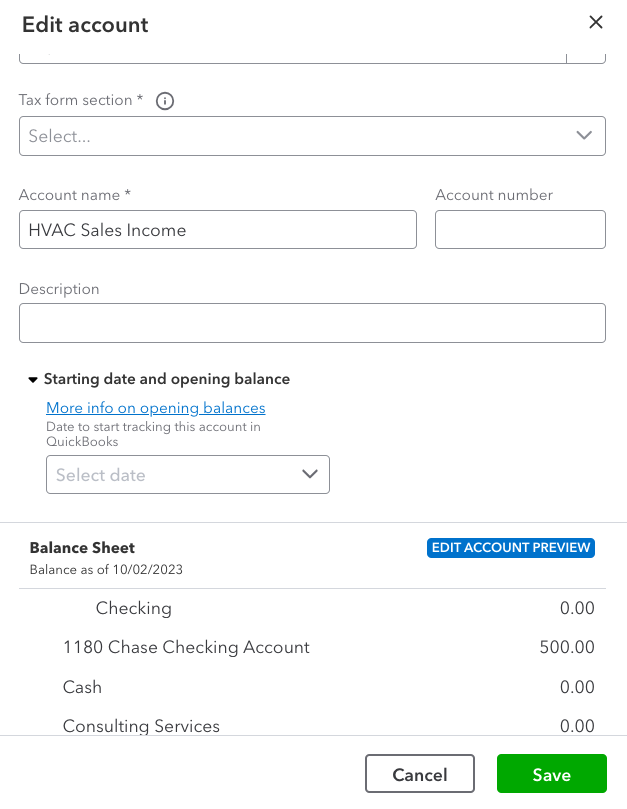
To edit an opening balance, click on the cog wheel icon and select Chart of Accounts, as you did when you created a new account. Next, locate the specific account and choose View register. Select the opening balance entry, and edit the date and amount as necessary. You can also choose Edit for further adjustments. Once done, save your changes.
Editing an opening balance in QuickBooks Online
Why Opening Balances Are Essential
Your accounts in QuickBooks Online should mirror your real-life bank and credit card accounts. When you create a new account in QuickBooks, you specify a start date for tracking transactions. To set the starting point for this account accurately, you need to enter the balance from your real-life bank account for that specific day. This amount, coupled with the chosen start date, establishes the account’s opening balance.
It is advisable to select a straightforward date for your opening balance. If you have recently opened a new account, use the day of its creation. For accounts you’ve had for a while, consider starting your opening balance on the same day as the beginning of your next bank statement. Regardless of the date you choose, always reference your bank statement to determine the account’s balance for that day.
Tip: QuickBooks automatically records all opening balances for your accounts in an ‘Opening Balance Equity’ account. This ensures easy access to your entries for future reference.
Wrap Up
To help you better manage your financials, it’s essential that you know how to enter and edit opening balances in QuickBooks Online. By following the steps illustrated above, you can ensure that your opening balances are accurate and effectively managed in QuickBooks, providing a solid foundation for your financial records.

Why QuickBooks Online Is a Game-Changer for Small Business Accounting
For small business owners, managing finances can feel like a constant balancing act, trying to stay on...

Can I Use the QuickBooks Online Test Drive to Test integrations?
QuickBooks Online can have a learning curve, especially for new users or businesses trying to integrate...

How Can I Contact QuickBooks Online Support?
Navigating QuickBooks Online can sometimes be challenging, especially when issues arise that require...

How Much Does Each QuickBooks Online Plan Cost per Month?
QuickBooks Online offers a range of subscription plans designed to meet the diverse needs of businesses...

QuickBooks Online Advanced vs Enterprise: A Detailed Comparison
QuickBooks offers two robust solutions for businesses ready to step up from basic accounting software:...

QuickBooks Online vs Desktop: Differences & When to Use Each
QuickBooks, a popular accounting software, offers two main versions: QuickBooks Online and QuickBooks...

Is There a Specific Time of the Month that's Best for Migrating to QuickBooks Online?
Migrating to QuickBooks Online can be a transformative step for your business, offering improved accessibility,...

Can QuickBooks Online Integrate with My Point-of-Sale (POS) System?
Efficient financial management requires seamless integration between your Point-of-Sale (POS) system...

Why Should I Migrate from QuickBooks Self-Employed to QuickBooks Online?
Migrating from QuickBooks Self-Employed (QBSE) to QuickBooks Online (QBO) can significantly enhance your...

How Does QuickBooks Online Handle Sales Taxes?
Managing sales tax is a crucial aspect of running a business. It can be complex and time-consuming, but...

Can I Import My Data From Another Accounting Software to QuickBooks Online?
Transitioning to a new accounting software can seem daunting, especially when considering the need to...

How Does QuickBooks Online Help With Project Management for Marketing Agencies?
QuickBooks Online offers a suite of tools that can significantly enhance project management for marketing...