


Just register for the free trial below and we will send you everything you need to evaluate QuickBooks Enterprise including 30-day access, sample company files, and the full 88-page QuickBooks Enterprise Guide that details everything that you can do in the software. Free end-to-end consultation and support are included so if you need any help along the way, just let us know!


The Fixed Asset Manager in QuickBooks Desktop lets you manage and track fixed assets as well as compute depreciation according to IRS standards. You can use the Fixed Asset Manager to add a new asset, assign an account to multiple assets, depreciate an old asset, or add and change the depreciation method of an existing asset.
Today, we’ll show you how to create a new fixed asset manager client as well as add a new asset in QuickBooks Desktop.
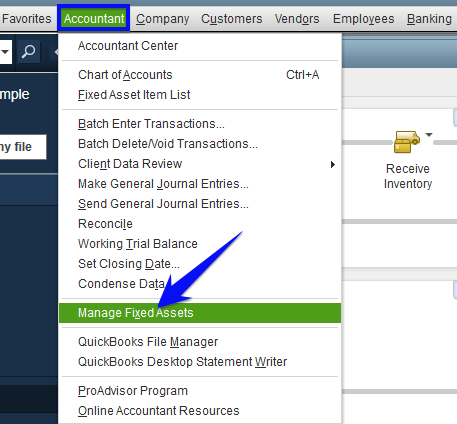
From your QuickBooks Desktop homepage, click on Accountant and Select Manage Fixed Assets.
After clicking on Manage Fixed Assets, the QuickBooks Fixed Asset Manager popup window appears, asking you which action you want to perform. Select Create a New Fixed Asset Manager client and click OK, as shown below.

The QuickBooks Fixed Asset Manager will then require you to complete a series of information, including General, Dates, Basis, Default Methods, and Asset Synchronization options. We’ll provide a brief overview of each section below.
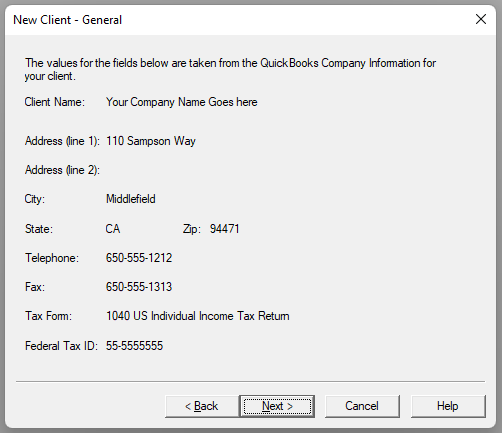
General: This screen covers basic information, such as the client’s name, address, and contact details.
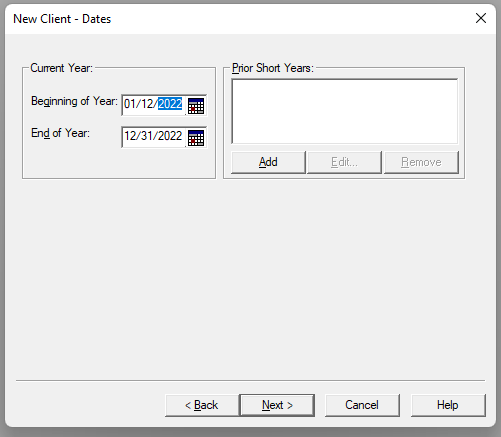
Dates: Input the current year beginning and ending dates for which the statements are being created. These dates are then used by the program to compute prior-year depreciation when you record an asset into the fixed asset manager.
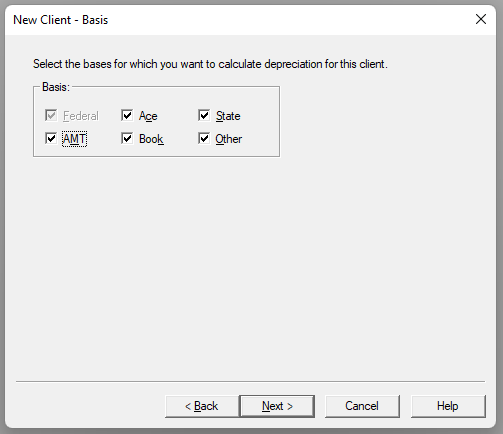
Basis: This section lets you choose which tabs appear in the bottom half of the Asset window.
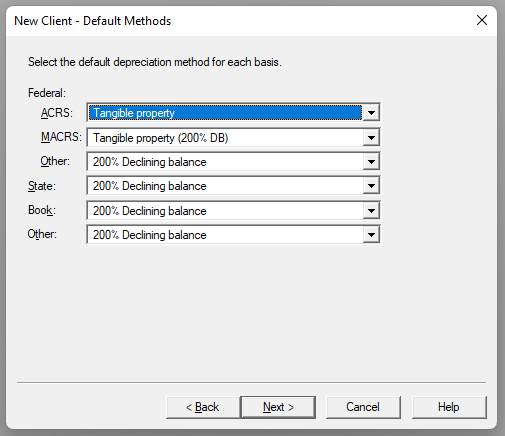
Default Methods: This window allows you to choose the default methods for each new asset created.
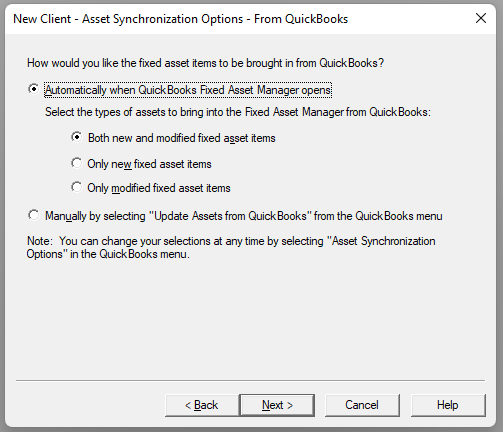
Synchronization (From/To): This screen lets you control how data move between QuickBooks Desktop and the Fixed Asset Manager.
Adding a New Asset in QuickBooks Desktop Fixed Asset Manager
To record a new asset, select Add from the toolbar or press F4 on your keyboard. You may also click on Add Asset from the Asset menu.
The Asset screen will then appears, requiring you to provide essential information.
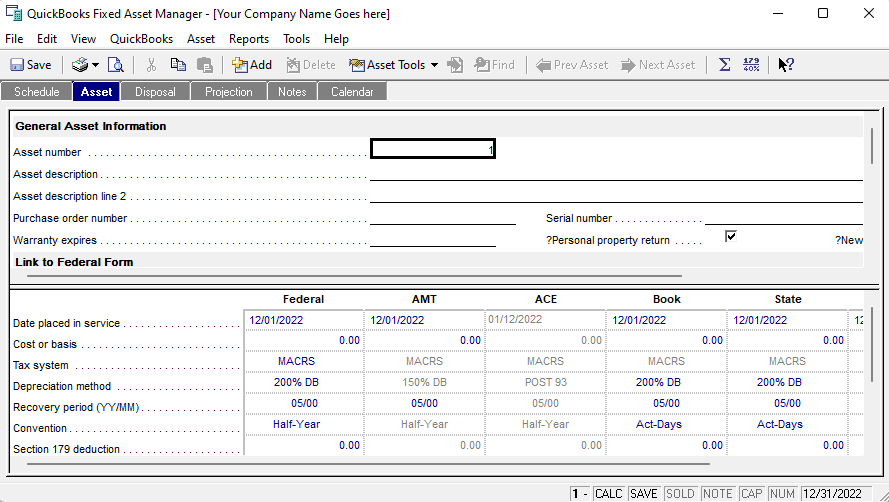
Once the new asset is recorded, use the top section of the Asset window to provide details, such as description, asset number, and purchase order number. The second half of the screen lets you record depreciation calculation details, like depreciation method, cost, and tax system.
These steps can be overwhelming at first, but when you or your accountant devotes time to learning it, the process becomes a breeze.

Why Choose QuickBooks Desktop Enterprise for Growing Businesses in 2026
As small businesses expand, their accounting needs become more complex—and not every software can keep...

What Are the Key Features of QuickBooks Desktop Enterprise?
As businesses grow, so do their accounting needs. What worked well for a small team may start to feel...

Why QuickBooks Enterprise Desktop Silver Monthly Is Perfect for Growing Businesses?
For growing businesses, having the right accounting software is very important. Such software helps businesses...

Why is QuickBooks Enterprise Ideal for Mid to Large-Sized Businesses?
As your business expands, managing accounting, inventory, and operations with entry-level tools can create...

Top 10 Features of QuickBooks Enterprise in 2026
Managing thousands of transactions, tracking inventory across multiple locations, and ensuring team-wide...

Can QuickBooks Enterprise Handle Multiple Company Files?
Managing multiple company files can be a complex task, especially if you rely on various platforms to...

Can I Access QuickBooks Enterprise on a Mac?
QuickBooks Enterprise is a powerful accounting software solution designed to meet the needs of growing...

What Industries Is QuickBooks Enterprise Best Suited For?
QuickBooks Enterprise is a comprehensive accounting software solution that is designed to cater to the...

How Many Versions of QuickBooks Enterprise Are Available?
QuickBooks Enterprise is a powerful and versatile accounting software designed to cater to the needs...

Can a QuickBooks Reseller Help with QuickBooks Enterprise Installation and Setup?
Implementing QuickBooks Enterprise can be a game-changer for your business, but it can also be a daunting...

What Are the System Requirements for QuickBooks Enterprise?
Whether you are setting up QuickBooks Enterprise for the first time or upgrading to a new version, understanding...

Can QuickBooks Enterprise Be Accessed Remotely?
QuickBooks Enterprise can be accessed remotely through cloud hosting solutions. By leveraging cloud hosting,...