


The Pay Now button in QuickBooks Online Payments is a time-saving tool designed to simplify the payment process for QuickBooks Online users. Essentially, the Pay Now button enables clients to make payments directly from the invoice. And to help them pay with fewer clicks, QuickBooks Online Payments has an online portal that provides your clients with a single convenient screen to complete payments.
In this article, we’ll discuss how the Pay Now button works in QuickBooks Online and how it can benefit your business and your clients. But before that, we’ll also cover the steps to set up QuickBooks Online Payments so that you can start adding the Pay Now button to your invoices.
QuickBooks Online Payments Account Setup
To use the Pay Now button in QuickBooks Online Payments, businesses need to have an active QuickBooks Payments account. This involves signing up for a QuickBooks Payments plan and completing the necessary setup, including linking a bank account for fund transfers. For QuickBooks Online users, they can easily set up QuickBooks Payments from the Account and settings page. Note that when enrolling for QuickBooks Payments, it takes up to two business days to get approval.
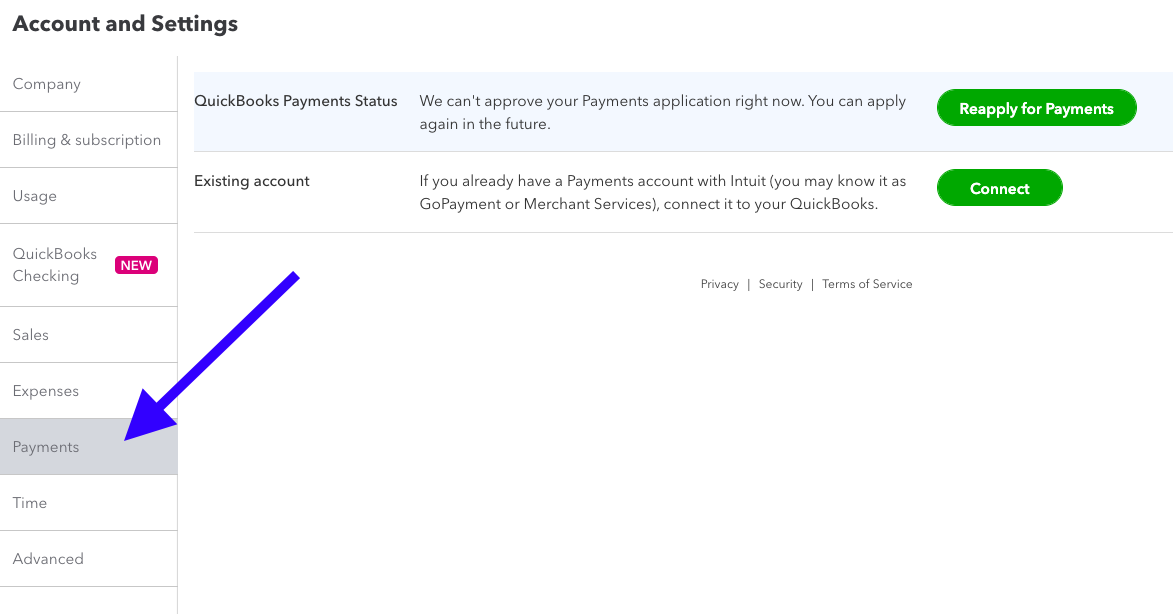
Setting up QuickBooks Payments within QuickBooks Online
Invoice Creation
Once your QuickBooks Payments account is approved and enabled, create an invoice as you normally would. From the invoice screen, select the customer to whom you are sending the invoice and specify the products or services provided, quantities, rates, and any applicable taxes or discounts.
When creating the invoice, just be sure to check the box that will enable your client to pay through their card.
Once you complete the invoice, click the Save or Save and send button in the lower right hand of the invoicing form. If you need help with QuickBooks invoicing, you can check out our guide on how to create and send invoices in QuickBooks Online.
Invoice Sent to Client
Once the invoice is generated and online payments are enabled, businesses send the invoice to their clients. The invoice is typically delivered via email, but you can also send the link through text. When your client receives the email, they will see the payment link where they can instantly make payments. When they click the Pay now button, it will redirect them to a secure payment page where they can process their payments.
Easily Get Paid Through the Client Portal
For added flexibility, your clients can pay their invoices through the online payment portal. The online portal includes everything that your customers need to process payment on a single screen. Here’s what your customers see in the client portal:
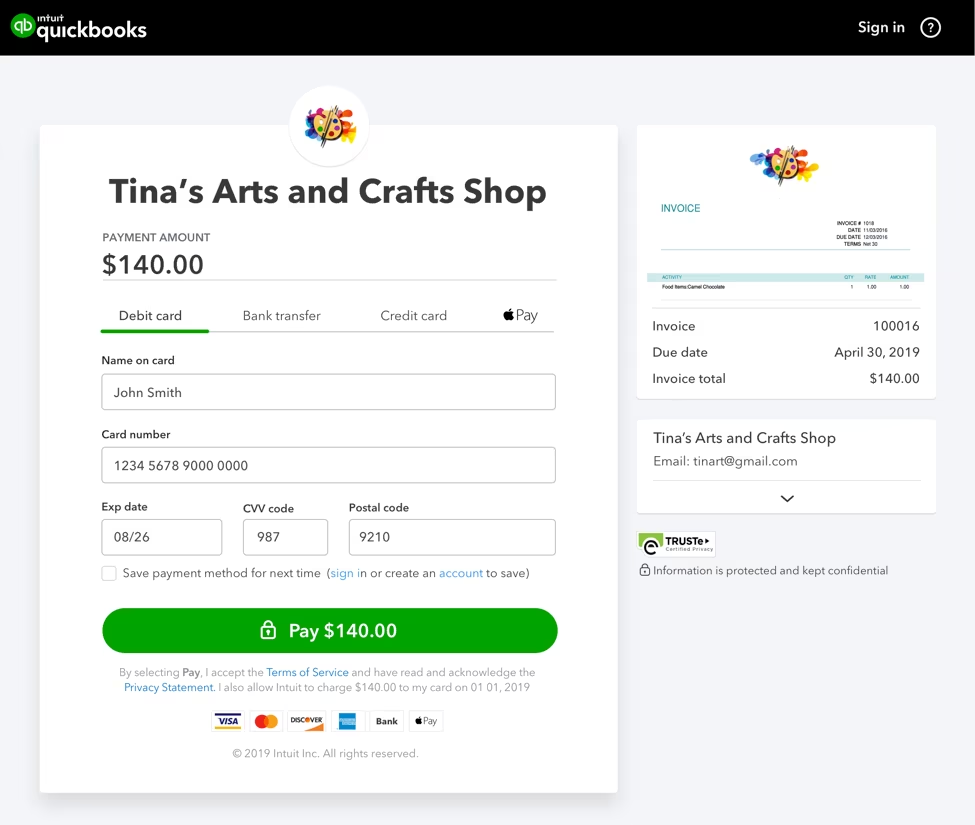
Online client portal in QuickBooks Online Payments (Source: QuickBooks)
Learn more about processing payments in QuickBooks Online Payments.
Wrap Up
The Pay Now button in QuickBooks Online Payments makes it easy for your clients to complete their payments, helping you better manage your receivables and cash flow. Additionally, with QuickBooks Online Payments’ online payment portal, your customers can now pay you with fewer clicks, improving their overall online payment experience.


