


Creating, scheduling, and e-mailing recurring invoices to your permanent or repeat customers are easy when you use QuickBooks to manage your accounting systems.
Edits to the bill or major changes in the invoice can also be made through QuickBooks. All the permanent items of the invoices are saved as templates and you have the option of adding new items. When QuickBooks ‘memorizes’ an invoice, it emails a copy to the customer after entering it to ledger according to your desired schedule.
How to Create and Schedule a Recurring Invoice
QuickBooks invoicing and payment processing helps you double the speed of your payment processes. For creating a recurring email invoice, follow the given steps.
- Open QuickBooks Homepage and select Invoice from Quick Create.
- Select a customer or add a new one.
- Fill in the fields required for products/services/cost/etc.
- Check online payment option ‘On’ for faster and easier payments.
- Click Save and Send.
- Email preview will appear on the screen along with an option to choose your desired payment method.
- Click Send.
Follow the given steps to memorize your recurring invoices.
- Go to ‘Create Invoices’.
- Select the invoice-to-be-memorized or create a new one.
- Select Edit and click ‘Memorize Invoice’.

- Select your desired options from the new window. The options include ‘Add it to my reminder list’, ‘Do not remind’, and ‘Automate Transaction Entry’ on daily/weekly/monthly basis etc. select the options according to your need.
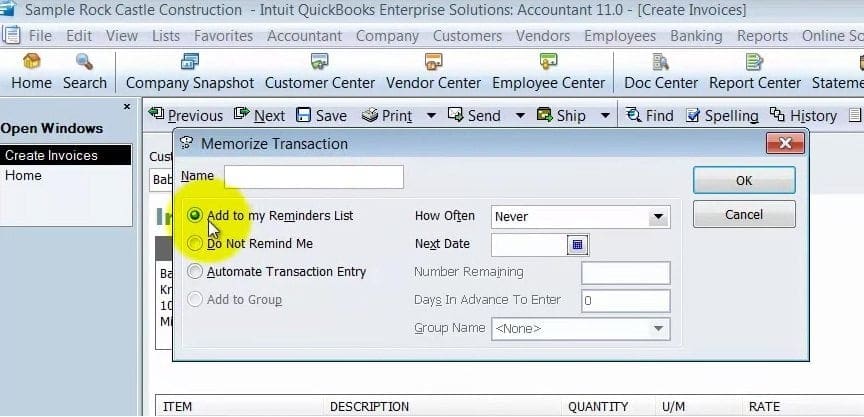
- Click OK.
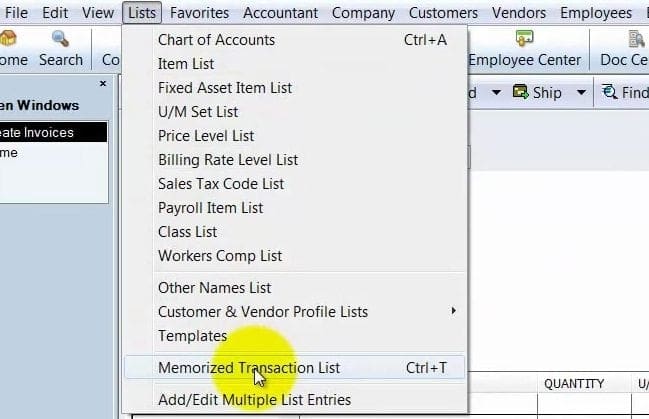
- Select Memorize Transaction List from the List bar to check if your task has been completed. You can also create groups from Memorized Transaction List at the bottom of the screen and then directly open your Weekly Transaction Groups, Monthly Transaction Groups, and Quarterly Transaction Groups.
- If you have any automatic transactions to be entered, QuickBooks will ask you to click ‘Yes’ when you log in.
Following are the steps for scheduling your recurring invoices.
- Select ‘Recurring Transaction’ from ‘Gear’.
- Click ‘New’ from Recurring Transactions list.
- Enter the Template Name and select Type from the box just next to Template Name. Select Type Scheduled.
- After filling in Customer’s Name and email address in next given boxes, checkbox ‘Automatically send emails’ from the Options.
- The remaining form will have fields including date and billing address. Fill in all the required fields.
- Click ‘Save Template’ tab at the right bottom of your screen.
In order to check the regularity in recurring invoice updating and developing, you have two options. The first one is to automatically CC yourself in the email so that you have a complete history of every customer’s invoice. For adding you to every customer’s email CC, go to ‘Select Gear’ and choose ‘Company Settings’. Now choose ‘Messages’ from Sales and check ‘Email me a Copy’.
The second option is to check the customer’s invoice status. Select Customers and choose the customer with recurring invoice. The transactions report of the customer will open with second last column showing invoice status of the customer.
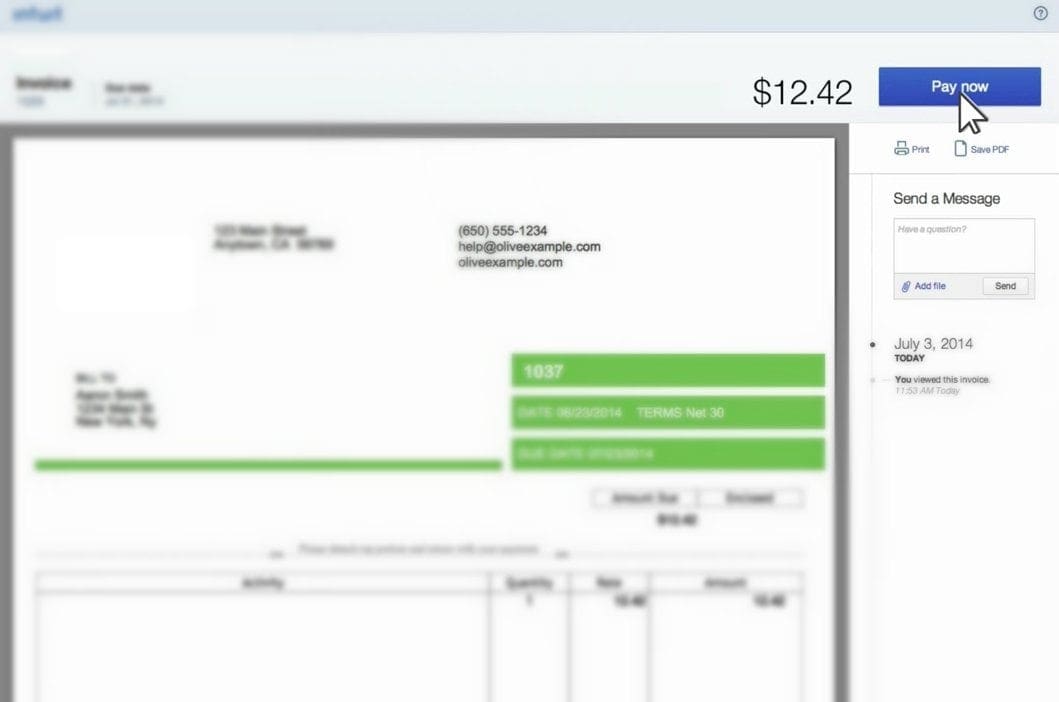
Save a Fortune with the Click and Pay Button
Consider you have sent out an email invoice to customer A. The customer will receive an email invoice along with a secure portal in tab ‘View Invoice Now’. Just on the top right of the Invoice display screen, A will click on Pay Now tab, and enter his or her credit card and bank account information. A confirmation email of funds transferred will be sent to complete the transaction.
You will receive an invoice payment confirmation email and QuickBooks will automatically deduct the paid amount from the accounting process.
Practicing the whole process 2 to 3 times will reveal how easy it is to save time with QuickBooks recurring invoices. Good luck!
[wpcaptevrix_sscta id=”2″]


